Uploading Sermons to Wordpress
written by: admin
written by: admin
Date Written: 6/28/09 Last Updated: 3/5/20
 VLC media player A free and popular media player that can also convert one audio format to another.
Audacity application for editing audio files.
Formating and Uploading Sermons
Step 1: Placement of recorder Place the Olympus audio recorder (VN-541PC) on the lectern to the left or right of the pastor's notes. This will give you the best audio quality. I have tried placing the recorder next to the lectern and inside the lectern, but this gives the recordings a hollow sound as if it were coming from a cave. Recording the sermon from the position of the audience causes the recording to sound as if it were coming from a distance. The quality is best when it is on top of the lectern about 1 to 2 feet away from the speaker.
Step 2: Operating the Olympus Recorder The battery reading should always be full otherwise the audio may cut out halfway through the recording. To record, slide the orange circle up. To stop recording, slide the orange button down. The power will turn off automatically after a few minutes.
Step 3: Renaming your files With the recorder plugged into your computer navigate to the Olympus drive and open the folder containing the audio files. You may need to search a few folders before you find where they are being stored. Be sure to delete the files on the recorder after they are uploaded to your computer to free up space on the recorder.
Rename the files to the date that the sermons were recorded in using the format MMDDYY. The leading 0 will need to be given if the month or day is a single digit. If two recordings were made that Sunday then append the name with an "a" for morning or "b" for afternoon.
070721 for July 7, 2021
070721a for July 7, 2021 10:30 a.m.
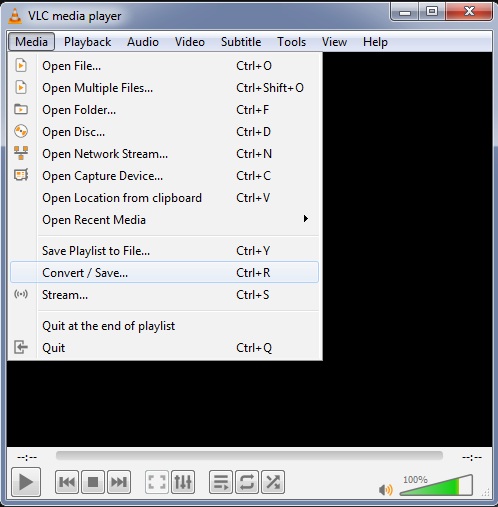
Step 4: Converting .wma to .mp3 Before the recording can be edited it needs to be in mp3 format. Open VLC and select Media --> Convert/Save. Drag the audio files that you want to convert here and select convert.
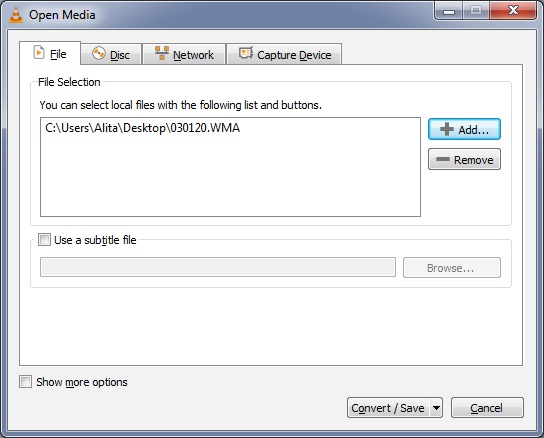 drag sermon to this box. Next, click on the convert button below.
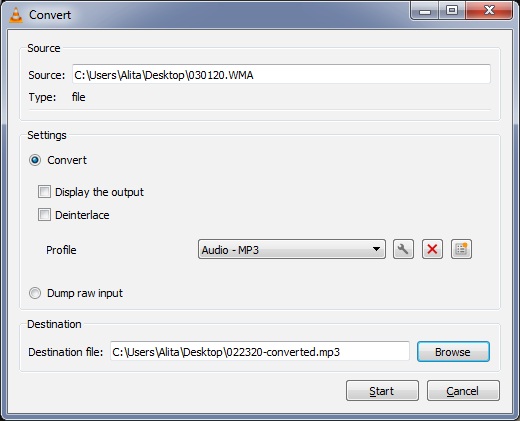
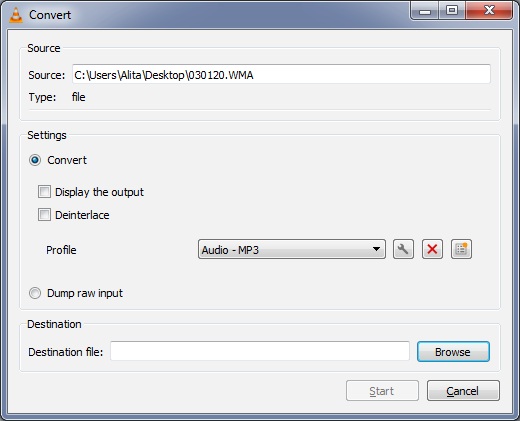 Click the browse button to navigate where you want the converted file to be saved to. This is a good place to give it a name of 120221, etc. for the date.
Step 5: Editing the sermon Open your audacity program and drag the mp3 file onto audacity. To expand the audio for easier editing, click on the magnifying glass in the circle in the top right corner to make finding the portions of audio you want to edit easier.
Step 6: What to edit The portion of audio we want is the sermon. It begins when the pastor references the scripture text to be discussed and ends after the closing prayer just after the conclusion of the sermon. Click on the point in the audio where the sermon begins. Hit play once or twice to be sure that this is the location you want. When you are sure, click shift+home to highlight all of the audio from the marker to the beginning of the file and then hit delete. For the portion after the end of the closing prayer, use shift+end to highlight everything after the closing prayer and then hit delete. The marker should be located just after the "amen" of the closing prayer.
- Optional: Occasionally, you may want to edit out the silence between when the pastor mentions the scripture text and waits for the audience to turn to the passage. This silence can be several seconds and is up to you if you want to edit this out or not. To do so move the mouse pointer to the beginning of the silence and click and hold the mouse pointer down and move the pointer to the end of the selected audio you want to remove, then release the left click. Then hit the delete button.
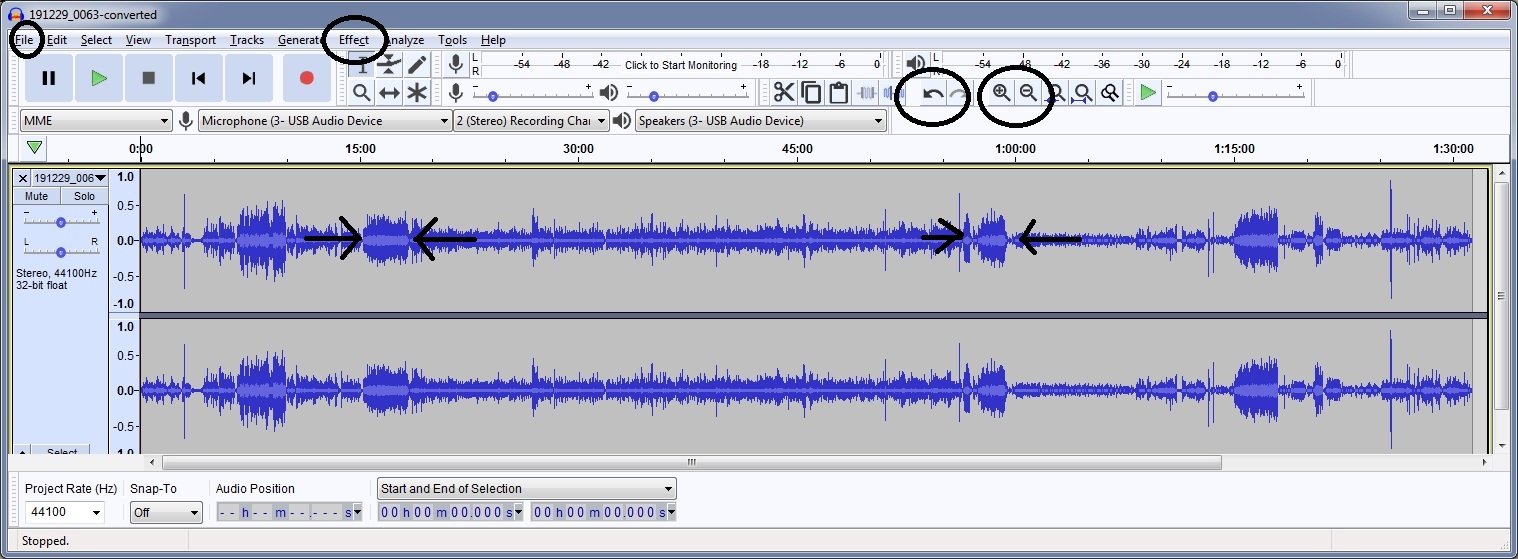
Tip: Congregation singing will look like the segment of audio above that is condensed and is between the two arrows. Finding this can help you locate the beginning and end of the sermons. The sermon is about 5 minutes after a block of singing.
Amplifying audio Quiet audio can be amplified by clicking ctrl+a and then in the menu click effect and then amplify.
An amplification setting of 10 is usually about right.
If you ever make a mistake, you can always select undo located just to the left of the magnifying glass.
Step 7: Export the Sermon Go to file and select "Export as MP3" A message will pop up asking if you want to replace the existing audio. Select yes and continue. Another window will ask you how you want to edit the tags. You can leave everything as 1 filling in only the pastor's name and the year.
Step 8: Uploading the sermon Login at http://sovgraceopc.org/login and select Log in with username and password
links
 Free Audio Converter Developer: DVDVideoSoft A simple free converter that can convert one audio format to another.
Important! when the option presents itself always choose custom installation and uncheck the box which will install third party software.
TAGS: website, audio